How to dry Garden fresh Herbs!
If you’ve been following us via our Blog or on Social Media, you know that this spring we started a Community Garden at the office! Well, our herbs are not only thriving, they are GOING CRAZY and so it was time to pick and dry our first batch! It was super easy, incredibly satisfying and now the whole office smells like pickles! Here is how we did it, and you can too!
SAGE

If you are picking the whole twig, tie them together in bunches to hang upside down.
If you are picking just the leaves, place onto a grate or net to dry.

We made smudge sticks with ours, and they are currently drying in my office closet…
(here is the blog on our Smudge Sticks…)
You want to store them in a dry, ventilated area that is NOT humid, and AWAY from sun. Sunlight dries the herbs out quicker, but can reduce the flavor drastically.
The ideal place is an outdoor room like a porch, or somewhere dark like a closet, pantry or attic (as long as they are dry!)
CATNIP
First start by harvesting long stems – we try to get ours at about 10”. Rinse the leaves, remove any dirt and allow to dry.
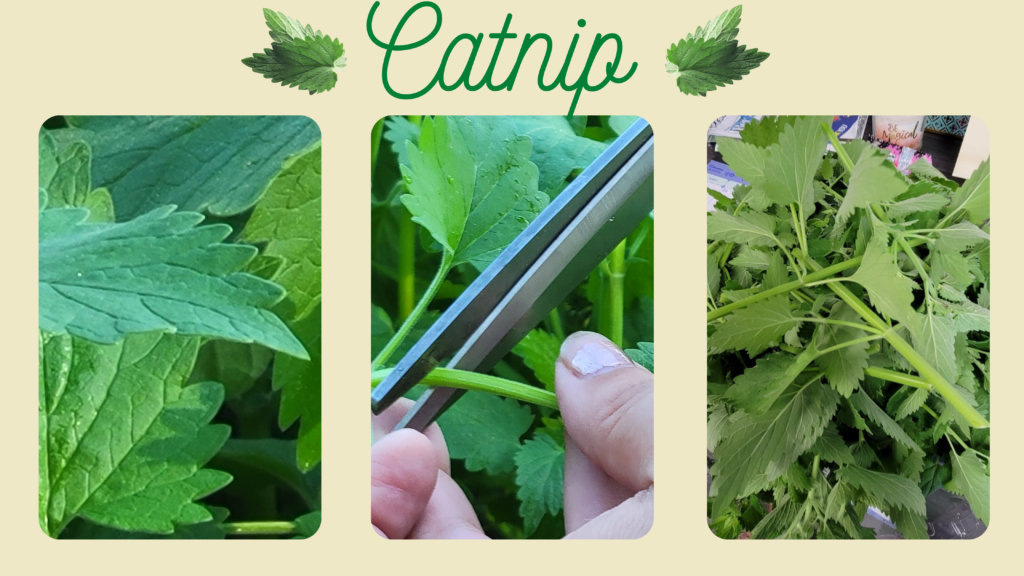
Once dry, remove the leaves close to the leaf – you don’t want to include the stems!
I’ve found catnip isn’t nearly as picky as basil or other plants – you do NOT have to do a single layer of leaves. Catnip leaves are very thin, so they dry very quickly.
Dry the catnip in your dehydrator on the lowest setting for 3-6 hours or until they are dry and crunchy.
When they are dry and crunchy, take them out and grind them up. You can use a coffee grinder, mortar and pestle or just your hands! Store and enjoy!
BASIL
Pick your basil, removing the leaves just above the next set of leaves growing in.
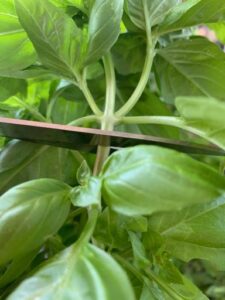
Pull your basil leaves off (don’t dry the stems) and wash/pat dry.
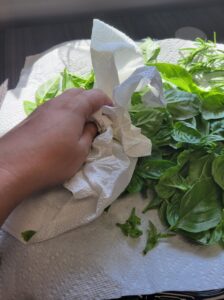
Lay your basil out onto the dehydrator trays. Try and leave some space in between leaves. Basil is one of those plants that should be laid FLAT, in a single layer if possible for best results.
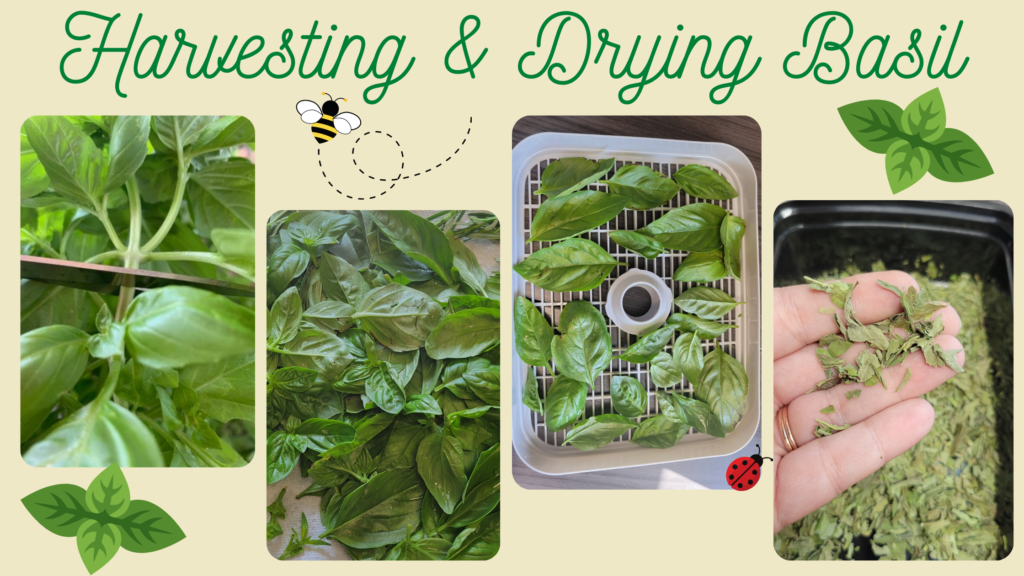
I dry my basil on a 105 temperature setting. Most tutorials say to do 95 or lower, but my dehydrator doesn’t go that low… and we’ve had no adverse effects!
Dehydrate your basil until it is completely dry – they should break when you touch them. You don’t want any moisture left for storage. This should take 14-16 hours in your dehydrator.
Transfer your dried basil (I have since learned to keep the leaves whole for longer lasting flavor!) to an airtight container. We use airtight Tupperware for this, and then move to jars when we are distributing it to co-workers, friends etc. Keep your containers in a dark, dry cabinet or pantry.
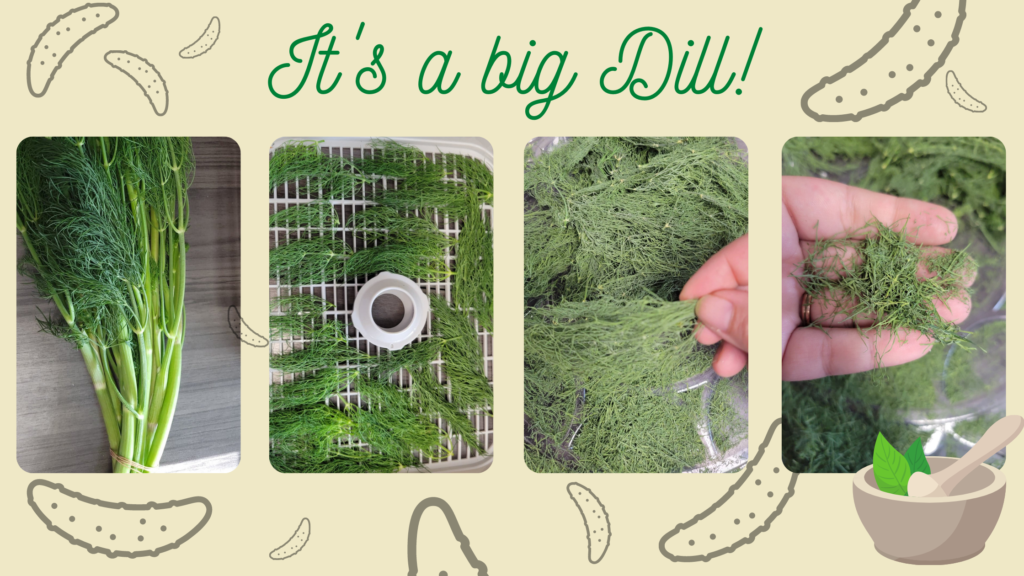
DILL
Picking dill is very similar to picking other herbs. Harvest ABOVE the new growth. Wash the dill and dry well. Separate the dill from the main stem by pinching off the the smaller stems. The first time we dried dill we were VERY careful to pinch off each individual stem. We quickly found out this was a waste of time. You don’t have to worry about breaking the dill or being gentle here.
Also, it WILL make a mess so work over the counter so you can sweep any bits into your dehydrator when you are done!
Lay out the dill pieces in a layer on a dehydrating tray. Like I said, you don’t have to be as picky with Dill as you do with other plants. Ours is layered every which way and still dries just fine.
Use a liner if you’ve got one, as the Dill WILL fall between the tray slats as they dry.
Set your dehydrator to the lowest setting (so for us 105 degrees) and allow the dill to dry for about 3-6 hours.
It won’t take nearly as long for Dill to dry as other herbs do, so be sure to keep an eye on it!
When the drill crumbles easily between your fingers, it’s done! Mince, store.